

I’m sometimes asked about my podcasting workflow, how SQPN goes about recording, editing, distributing, and promoting our shows. This is the fourth in a series of posts that explain the multiple steps that take me from the beginning to the end of the process for each show we produce. The first post was about my hardware setup, the second was on research, prep, and organization, and the third was how I record the shows.
After I finish recording a show and I've received all the files from others, I store them in a Dropbox folder until I'm ready to edit. My editing software of choice is Adobe Audition, a powerful application that is part of the Adobe Creative Suite. In addition, I use a set of audio processing plugins called Izotope RX 7 Standard.I should give a disclaimer right here up front: I am not an audio engineer nor an expert sound editor. I know just enough--self-taught, helped by friends, and gleaned from numerous YouTube tutorials--to make our shows listenable. There are other people who are much better sound editors and we are lucky enough to have Victor Lams, who volunteers to help edit some of our shows, especially those with long lead-times for editing. But most of the editing falls on my shoulders at this point, until at least SQPN gets to a financial point not only where it's breaking even, but with enough surplus to pay a real sound editor.
That said, here's what I do.
Cleaning up the files
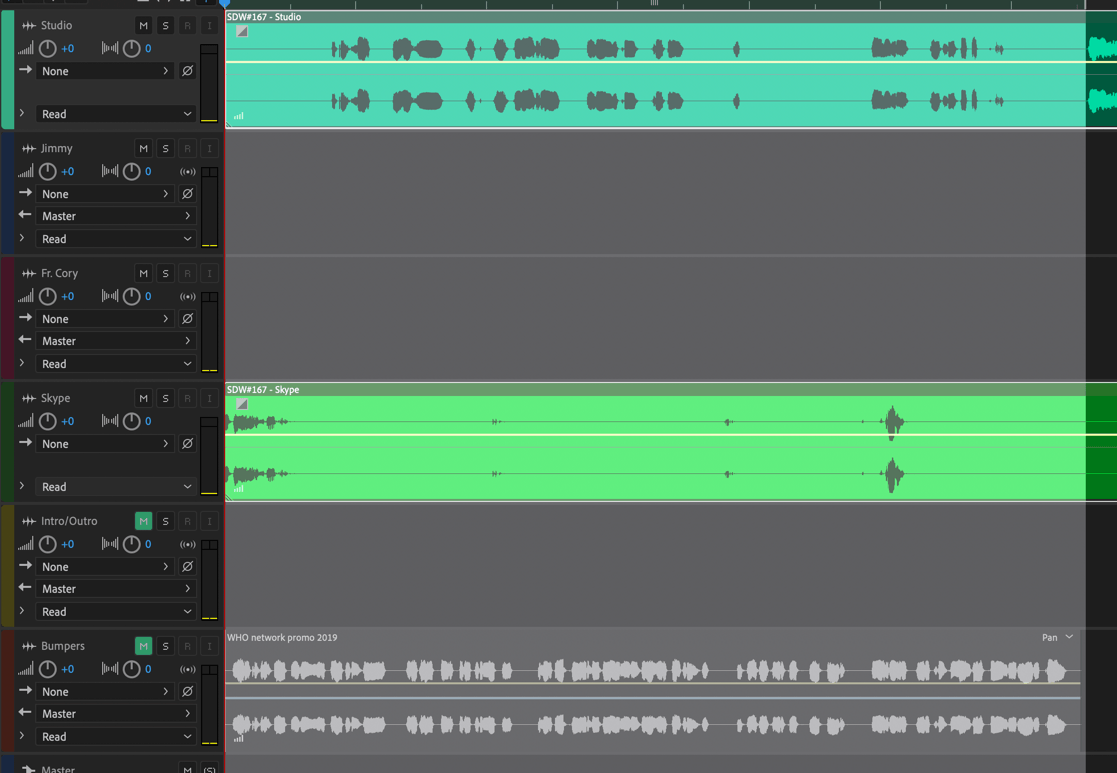
I have created templates for each of our shows that include a standard number of tracks, usually including one for the host, one for each of the panelists, a track for Skype, a track for intro and outro theme music, and another for bumpers or incidental audio. So, I'll open the appropriate template and then add the files I've received from the participants, as well as my main and Skype tracks.

We usually ask panelists to record their own microphone and export it in uncompressed WAV format if possible. This gives us the best audio to work with. Sometimes, however, we get other formats, most often the Apple-specific m4a as recorded in QuickTime player. Very often, unless they're a podcaster already, there will be lots of background noise (from the room, fans, computers, etc.) plus incidental noise (e.g. people talking in the background, squeaking chairs) and their levels can often be very low or high. There may be an echo or if they don't have a pop filter, lots of plosives, or harsh "ess" sounds.
Step one is to convert everything into a standard format: 44.1kHZ, stereo, uncompressed WAV. In order to edit a multi-track recording in Audition, all the tracks must match the same kilohertz specs.
Then I go through each file and, where necessary, use the "Noise Reduction (process)" effect to automatically remove noise from the background. Because such noise is usually uniform (mostly), an automated process can get rid of most of it. Through some trial and error, I've settled on the settings of 80% noise reduction and "Reduce by" 15dB as generally the best in most situations.

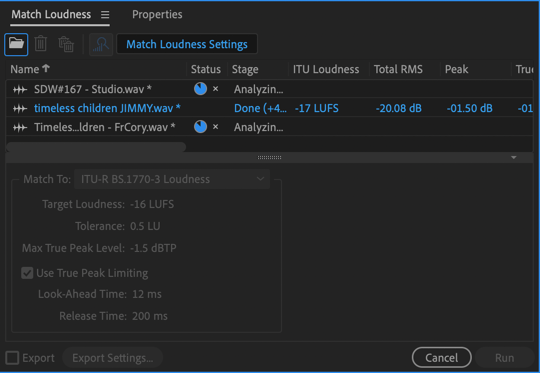
The next step is to level all the audio tracks by Matching Loudness.1 I drag them into the Match Loudness window, where the tracks are analyzed and it's amazing how much the tracks can vary. They can vary by over 10 or 20 dB of loudness, which if not fixed would mean some people on the podcast would be very loud and others would sound like a whisper. The agreed-upon standard for podcasts is -16 LUFS2
Once, this is done, I then run each file through the Parametric Equalizer filter. This is a matter of taste and style. Through trial and error and some reading, I've settled on a standard setting that boosts voices, providing a little more roundness and bottom, but also clearing up some of the highs so it doesn't sound muddy. This is an area where I'm certain a more knowledgeable editor would do a better job than I do, but it works generally.
The final step in cleaning up the files for editing is usually Compression using the Dynamics effect. In this one, I use both the Compressor, which makes sure the highs are not too high and the lows not too low, and the AutoGate, which filters out more of the quieter noise, both steady background hiss as well as some of the incidental noise, that wasn't caught by the noise reduction process.

My compression settings are -18 dB, ratio 4, 1ms attack, 10ms release, and 6.6 dB makeup. For autogate, threshold is -35 dB, 1 ms attack, 100ms release, and 1 ms hold. To be honest, I'm not sure I understand everything here, but I do know that this generally works to clean up all but the most poorly recorded tracks.
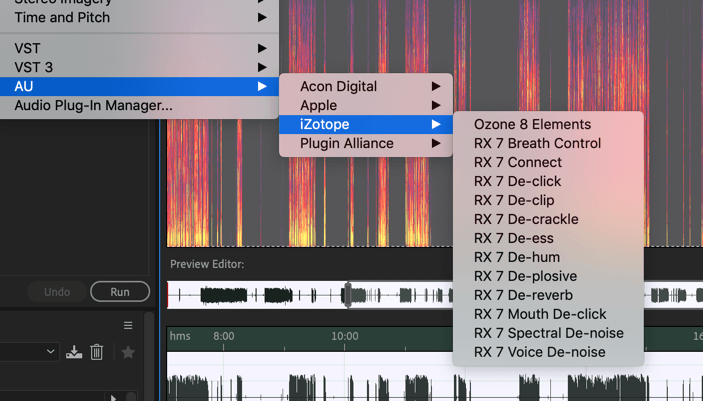
Most of the time, these steps are enough to get started with putting the show together, but if there's room echo or plosives or ess sounds or mouth clicks, I will go further. In this case I would select the appropriate module in iZotope RX 7, using my default settings and run it on the track that needs it. Sometimes, I only do this step after I've started editing and hear the problem as I go.
Putting the tracks together
After I've placed all the tracks in the main session, the next step is to line everything. Because my track and the Skype track start at the exact same time in Audio Hijack, those are my references. I start every show by introducing my co-panelists and so I begin by looking for their first responses on both their tracks and the Skype track, then zooming in and lining them up.
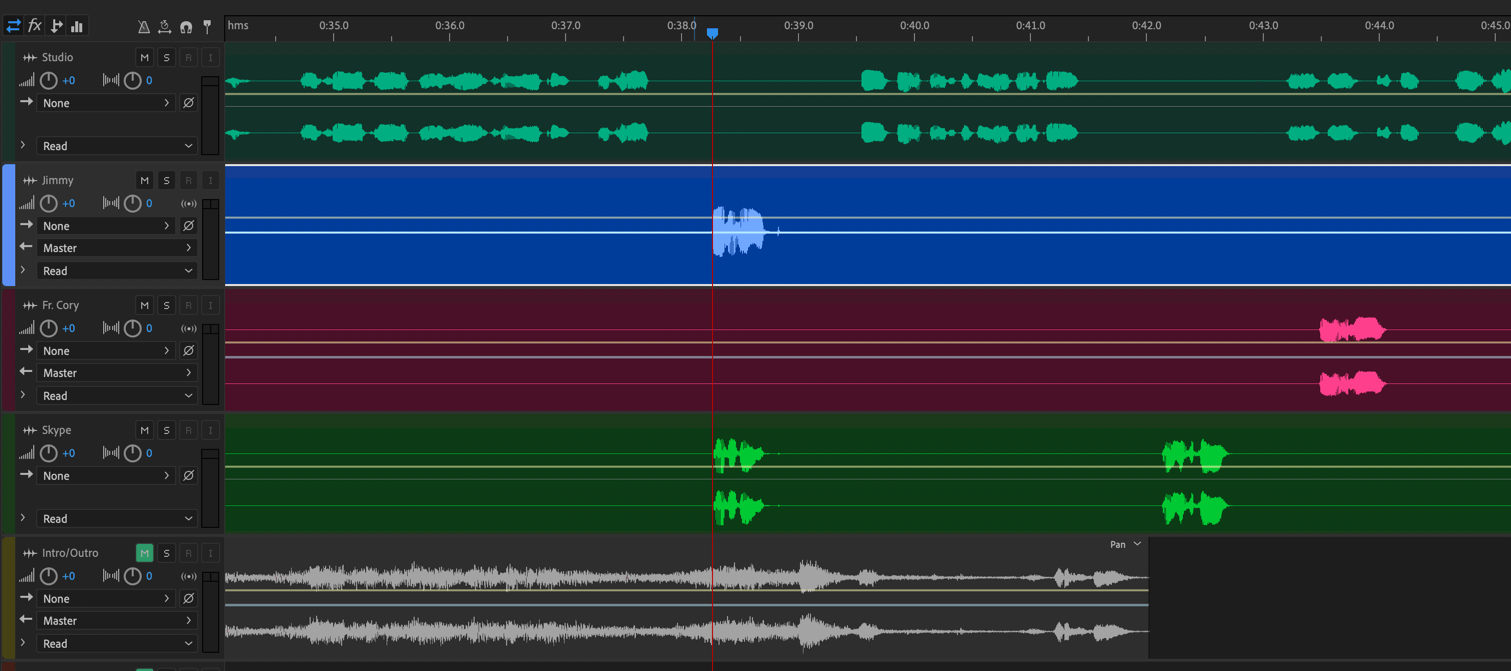
To do so, I sometimes have to trim off unnecessary bits of the beginnings of their tracks if they started recording before I did. If I get it right, when I play it, the Skype and individual tracks sound like one file, with no echo or offset. At this point, I probably won't need the Skype track again so I mute it.3
Now, I will lop off any preliminary non-show bits, cut off my opening stinger bit to put between the network Id at the front of every show and the theme music and then move all the other tracks, en masse, keeping them aligned, to their correct start point after or during the intro (it depends on the nature of the intro.)
From this point, it's a matter of working through the episode, cutting out any noises that made it through the previous steps, like coughs or loud noises. I will take out any long pauses, moments where we had to interrupt for any reason, undo certain kinds of cross-talk, and so on.
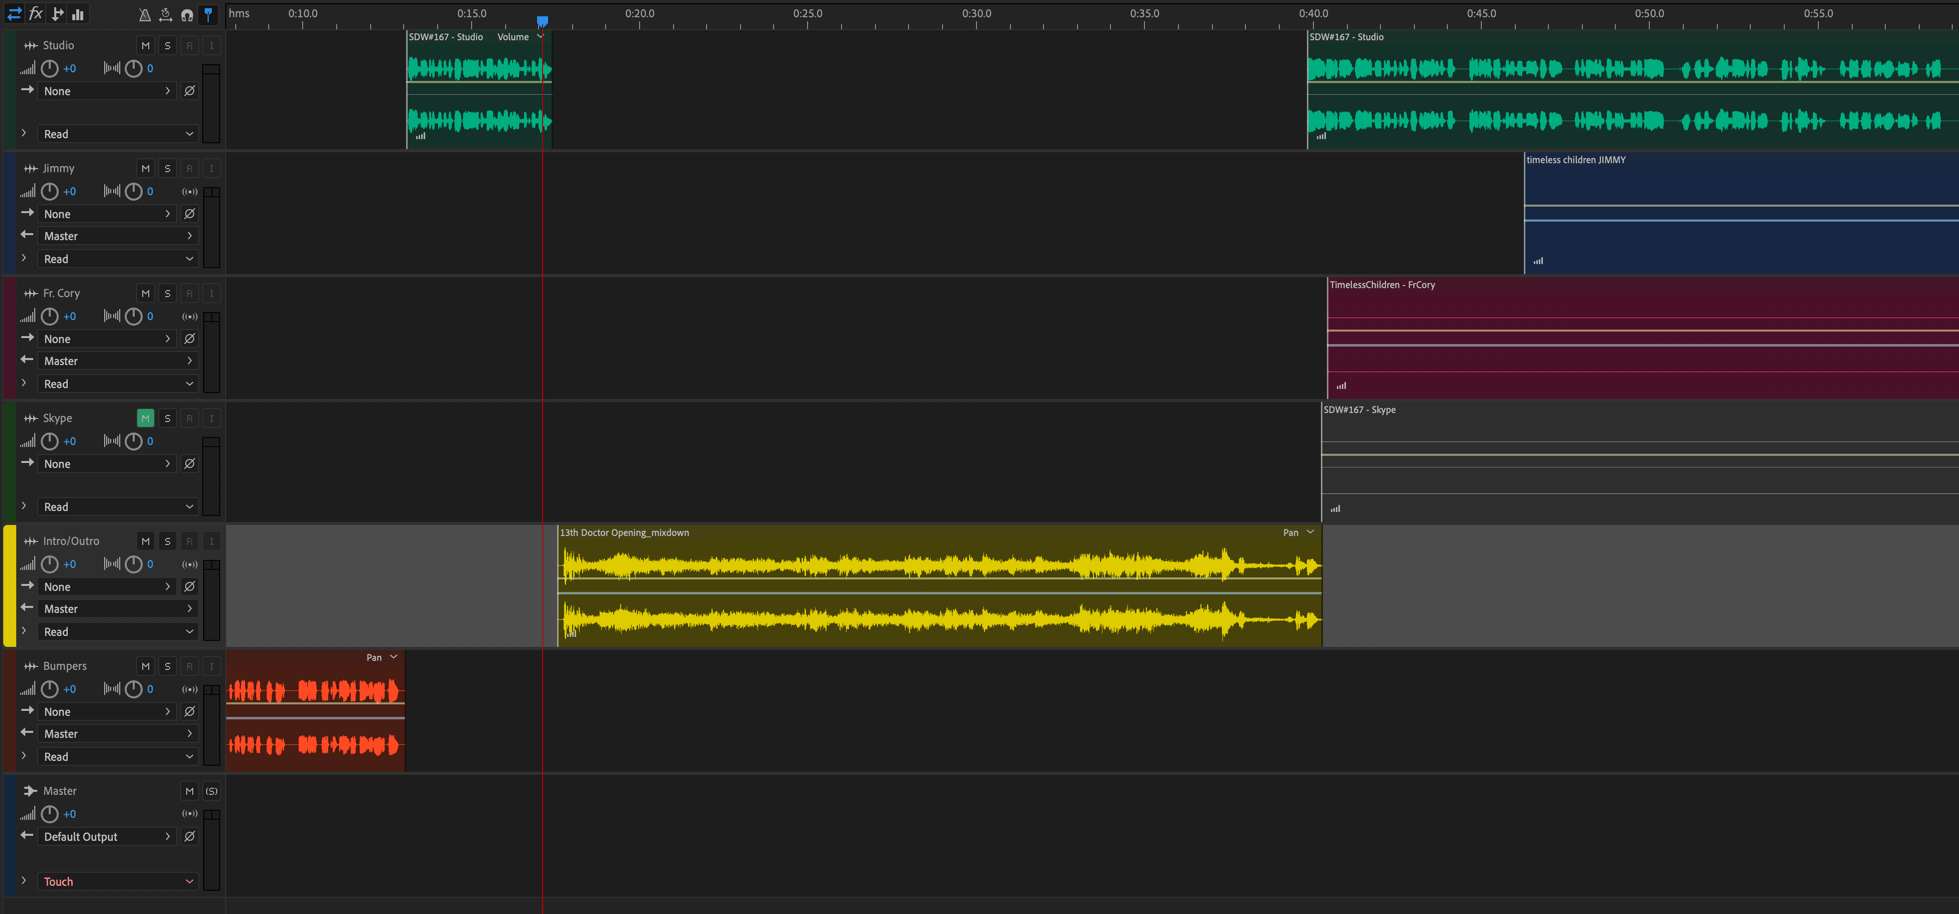
Once I've gone through the whole episode, I lop off anything remaining after my sign-off and then line up the outro music with the end of the speaking and save. Finally, I do a multitrack mixdown export as a single uncompressed WAV file, in preparation for final processing into the mp3 file that will be distributed. But that's for next time.
And so in my next post, I will explain the process of post-editing, distribution, and promotion of each episode.
- Because the Skype track is for reference only or emergency backup, I don't include it in any of these steps to save time. ↩
- In Audition, I select the ITU-R BS.1770-3 Loudness setting. ↩
- I do keep it around though. Because of the vagaries of Skype, sometimes new delays could cause offsets of our conversation so it can be useful to help re-align things later on in the show. ↩
Thanks for sharing. I love your podcasts!
You podcasts are amazing always
Thanks Elad!